
Guide
WARDOGS FOB guide: what a Forward Operating Base costs, what it can hold, and the three supplies that feed it
A WARDOGS FOB — Forward Operating Base — is the thing that turns a spot on the 256 km² map into a position: a spawn vehicle with walls around it, a mortar behind them, anti-air on top, and a supply chain running back to the main base. The wiki defines it as 'player-built fortified positions that provide access to larger construction options and defensive systems', and BULKHEAD's Season 1 changelog tripled its price two days before launch 'to make them more of a choice'.
This guide covers what a FOB is for, what it can hold, what feeds it, where the sources suggest putting it, and what it costs after 9 September 2026. It draws on the wiki's Game Mechanics page (which mirrors BULKHEAD's playtest documentation), the Season 1 changelog, patch 0.11 and PCGamesN's launch-week guides. It does not give build orders or structure hit points, because no source publishes them.
Small builds anywhere, big builds at a FOB
Construction in WARDOGS has two tiers. 'Small defensive structures can be constructed in the battlefield, while larger structures and defensive systems can be constructed through a Forward Operating Base' (wiki). The tool is a hammer, and hammers are tiered — Medium and Large appear in the changelog on the Support track, and PCGamesN says the mortar needs 'the highest tier of hammer', the Large Hammer, which unlocks at Support level 8.
The wiki's list of what a FOB is for reads like a mission statement: 'create a fortified position around a strategic location, protect a spawn vehicle, support logistics operations, and provide defensive firepower.' The phrase 'protect a spawn vehicle' matters — PCGamesN's money guide describes driving the mobile spawn point into the zone and being paid on arrival and per spawn, and a FOB is what keeps that vehicle alive.
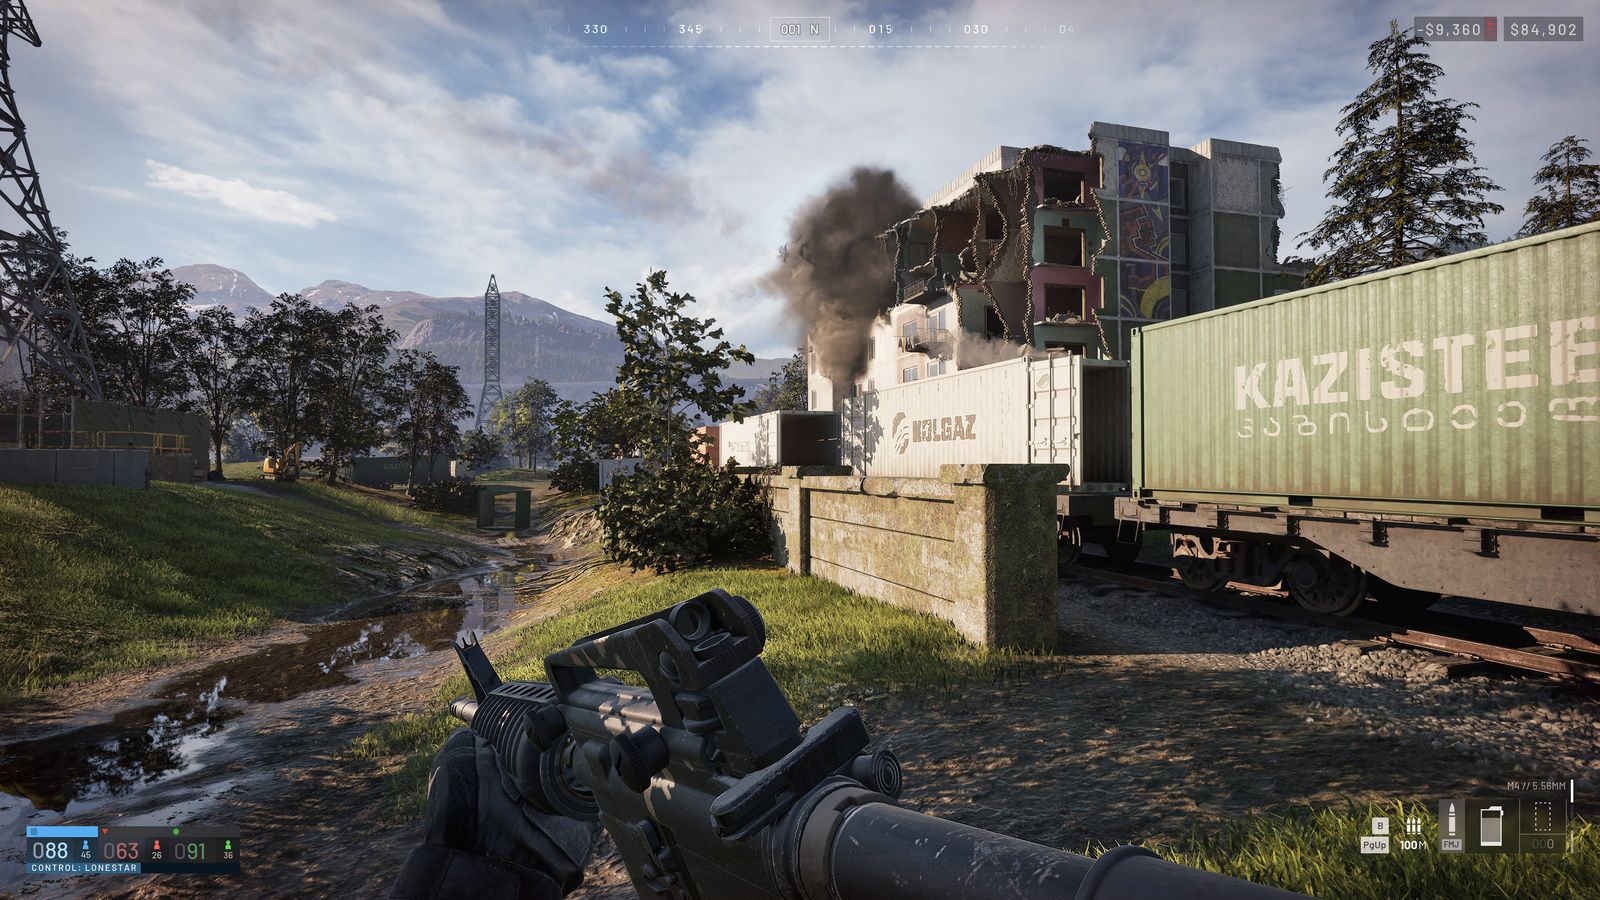
The FOB in the larger design
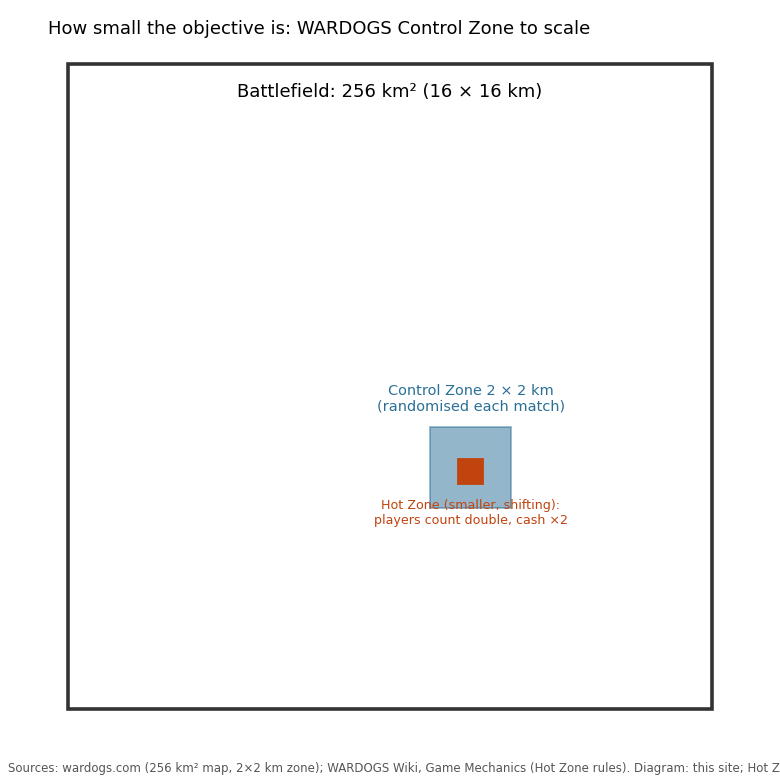
BULKHEAD lists 'Base Building & Destruction' as one of the four pillars in its February 2026 announcement post, alongside infantry, vehicles and the 'Teamplay = Cash' system, and the Steam description gives the FOB its own sentence: 'you could choose to fortify a strategic chokepoint by building your own forward operating base'. The wiki's Game Modes page explains why it matters for the objective: 'The ability to construct and reinforce positions allows teams to turn areas around the Control Zone into fortified defensive positions.' Since control is decided by head count inside a 2 × 2 km zone, a base that keeps players alive inside it is worth points directly.
The design also links the FOB to spawning. The wiki's list of FOB purposes includes 'protect a spawn vehicle', and PCGamesN describes the mobile spawn point as a vehicle you drive into the zone and park, earning on arrival and per spawn. A FOB around that vehicle is the difference between a team that reinforces the zone in seconds and one that drives from main base every life — 'it takes absolutely ages', in PCGamesN's words.
What a FOB can hold
The wiki lists the 'current playtest construction options' and notes they 'may change during development'. We reproduce the list as written; nothing has been added to it.
| Structure | Role (wiki wording where given) |
|---|---|
| Sandbags and other defensive fortifications | Cover and walls |
| Mortars | Static indirect fire 'from behind the front line' |
| Talon anti-air launchers | Air defence |
| CIWS air-defense systems | Air defence |
| Other static defensive weapon systems | Not itemised |
| Vehicle repair facilities | Repair |
| Vehicle refueling facilities | Refuel |
| Switchblade drone launchers | Loitering munitions |
| Drill rigs | Not described in any source we have; a community guide pairs them with towers |
What builders learned in week one
A Steam community guide by Skivin ('Foundational Tips for Beginning Builders', read 14 September) adds the operational detail the wiki lacks, and we cite it as a player's account. The FOB kit 'acts as both the central item that determines your building radius and as a stockpile that holds all of the materials you'll use to build your base. If an enemy reaches this, they're able to hack it and take over your base, so walling it off as soon as possible should be your #1 priority.' Doors: 'Doors do close automatically after about a minute, but a minute is more than enough time for someone to sneak in… When you close doors, make sure they actually fully close.' Breaching exists — 'Halligan bars can pry open doors and C4 isn't that expensive'. Supplies: 'Items delivered in crates need to be purchased from the crate and manually delivered to the FOB's storage… but the large supply pallets can be unpacked anywhere within the FOB radius and will automatically deposit their resources remotely.'
PC Gamer's beta notes fill in the builder's income: 'Every productive swing of a hammer earns cash ($15 in the beta), and completing a build can be worth more than getting a kill ($1,200 to $1,500)', built by 'holding LMB with your hammer (hitting the yellow X's makes it go faster)', with a perimeter of 'walls, gates, and Hesco blocks'. Those are beta figures the changelog may have changed; the mechanics are not in any BULKHEAD post.
Fuel has a third customer besides vehicles: drills. Per hammerworth's community guide, a tower's Hot Zone drill runs 'for as long as that FOB has fuel supplies', and a buildable drill 'consumes fuel too'. The towers guide covers it.
Hammers: the tool tiers as published
The vendor sells a Large Hammer for $2,400 (was $1,600). The Support track lists a Medium Hammer at $25,000 (was $10,000) and a Large Hammer at $75,000 (was $25,000), with the Large Hammer's unlock moved from level 7 to 8. No source explains why the vendor and the track both list a Large Hammer at different prices, and no source names a Small Hammer, so we report the listings as they appear. PCGamesN's mortar guide treats the Large Hammer as 'the highest tier of hammer' and the mortar as its gate; its money guide treats a plain hammer from the vendor as enough for walls, barricades and a door.
The three supplies
A FOB is 'supplied through logistics', and the wiki names three supply types: 'Building Supplies — construct and repair structures. Ammo Supplies — static weapon emplacements such as mortars and anti-air. Fuel Supplies.' Every structure in the table above consumes at least one of them, and the emplacements consume two (building to make, ammo to fire).
Supplies are bought at the spawn base and moved by players. PCGamesN's mortar guide: ammunition 'like building supplies, is purchased from the spawn base — so make sure you either have some in your inventory or politely ask your pilot teammates to drop some off.' Its money guide describes the pilot's side — buy supply crates at spawn, fill them, drop them in the zone, get paid when teammates buy from them — and the changelog priced the Pilot track's small armoured supply crate at $10,000 (was $5,000). So a FOB has a running cost paid by whoever keeps it fed, and a revenue stream for whoever does the feeding.
Where to put it
The wiki's placement advice is short and worth taking literally: FOBs 'can be particularly effective when established near the Control Zone, Hot Zone, towers, important routes, or defensible terrain.' Each of those has a reason in another source. Near the Control Zone because that is where head count scores. Near the Hot Zone because cash and count double there — and because a tower base with the full code can pull the Hot Zone to itself (PCGamesN). At a tower because it is a 'focal point for your FOBs' with a vantage point built in. On a route because the spawn-to-zone drive is long and taxis, supply runs and the mobile spawn point all use roads.
PCGamesN's practical version for a new player: the tower nearest your spawn. It is reachable, the cooldown gives you time to build before anyone can flip it, and 'each successfully constructed building earns you Support XP and a bit of cash'.
What it costs now
The Season 1 changelog is explicit: 'Forward Operating Base and Large Hammer vendor prices have gone up to make them more of a choice.' The FOB went from $2,500 to $7,500; the vendor's Large Hammer from $1,600 to $2,400; the Support track's Medium Hammer from $10,000 to $25,000 and its Large Hammer from $25,000 to $75,000. The Large Hammer's Support unlock moved from level 7 to 8. The vehicles that carry supplies also moved: URAL down to $35,000, URAL Covered unlock down from Driver 30 to 18, Kodiak Flatbed up to $35,000 but its unlock changed from Driver 2 to 10, Large Supply Crate unlock down from Driver 20 to 16.
For a squad, that means a base is a shared purchase: one player's $7,500 FOB, another's $2,400 hammer, a pilot's $10,000 crate. The 'Big Spender' achievement ($100,000 on a single loadout) is the ceiling of what one player can put on the line; a base spreads that risk across the team.
A base, start to finish, in the sources' order
Buy: one player takes the $7,500 FOB and a hammer; a pilot takes a supply crate ($10,000 for the small armoured one). Move: drive or fly to the site — a tower nearest spawn for a first attempt, or near the Control Zone or a route for a team that knows the zone. Place: put the FOB down and start with the wiki's first item, sandbags and fortifications, which need building supplies and pay Support XP and cash per structure. Defend: add Talon anti-air or CIWS before the first helicopter arrives, then a mortar once a Support-8 player is present, fed by ammo supplies. Sustain: keep building, ammo and fuel supplies coming from the spawn base; the pilot who delivers them is paid when teammates buy from the crate. Repair and refuel bays keep the team's vehicles in the fight without the drive home.
Then the tower play: if the base is at a tower, capture it once the cooldown clears, collect code parts from other towers, and decide whether the base can hold the Hot Zone before entering the full code. Every step above is documented in the wiki, the changelog or PCGamesN; what is not documented — build times, structure health, supply quantities per structure — is left out on purpose.
Building pays — and the rules around it
Support XP and cash per completed structure make building the safest income in the game, per PCGamesN. Two rules from the developer apply. First, BULKHEAD's enforcement policy lists 'playing to farm rewards rather than to play the game' among bannable conduct, and patch 0.11 adds 'XP farming' to the list it will act on; building useful structures is not farming, building and demolishing the same wall is. Second, the changelog notes a fix for 'a crash involving buildables' and that 'dropped items no longer affect navigation', so if your base has been crashing clients, the launch build addressed at least one cause.
The FOB also anchors the Hot Zone play from the towers guide and hosts the mortar from the mortar guide. Read those two next; together with this page they are the whole construction side of WARDOGS as the sources currently describe it.
Questions people ask
- How much does a FOB cost in WARDOGS?
- $7,500 from the vendor after the 9 September 2026 Season 1 changelog; it was $2,500 in the beta.
- What can you build at a FOB?
- Per the wiki: sandbags and fortifications, mortars, Talon anti-air launchers, CIWS air defence, other static weapons, vehicle repair and refuel facilities, Switchblade drone launchers and drill rigs.
- What supplies does a FOB need?
- Building supplies (structures), ammo supplies (mortars and anti-air), and fuel supplies. They are bought at the spawn base and delivered by players.
- Which hammer do I need?
- Small structures need a hammer from the vendor; the mortar needs the Large Hammer, unlocked at Support level 8.
- Where should I build my FOB?
- The wiki suggests near the Control Zone, Hot Zone, towers, important routes or defensible terrain; PCGamesN suggests the tower nearest your spawn for new players.
- Does building earn money?
- Yes — PCGamesN: each completed structure earns Support XP and cash.
- Can a FOB be destroyed?
- The map is destructible per BULKHEAD, but no source publishes structure health or destruction rules for FOB buildings.
- What do drill rigs do?
- Not described in any primary source we have. They appear in the wiki's FOB list and in a community guide title alongside towers.
Sources & further reading
- WARDOGS Wiki — Game Mechanics: Construction, FOBs, Supplies (CC BY-SA), read 14 Sep 2026
- BULKHEAD — Pre-Load Live & Season 1 Changelog (Steam, 9 Sep 2026)
- BULKHEAD — Scheduled Maintenance & Patch 0.11 (Steam, 12 Sep 2026)
- PCGamesN — How to make Wardogs money fast (11 Sep 2026)
- PCGamesN — How to build a Wardogs mortar (11 Sep 2026)
- PCGamesN — How to capture Wardogs towers (11 Sep 2026)
- wardogs.com — Security and Enforcement (updated 7 Sep 2026)
Read next
- WARDOGS guide
WARDOGS guide hub: how the Control Zone and Hot Zone score, how the $10,000 cash loop and six progression tracks work, and links to nine guides — first match, money, towers, mortar, FOB, classes, vehicles, settings and achievements — each traced to BULKHEAD's patch notes and the official wiki.
- WARDOGS mortar
WARDOGS mortar guide from the sources: it needs the Large Hammer (Support level 8 after Season 1), building supplies at a FOB, and ammo supplies to keep firing; you aim by heading and range with no map overlay, WASD for coarse and mouse for fine. Prices, the changelog's loadout-slot change, and what nobody has published yet.
- WARDOGS towers
WARDOGS towers explained: where the control-room terminal is, why every tower starts a match on cooldown, how each capture gives one part of a four-digit code, and how the full code on the keypad pulls the Hot Zone to your tower. Plus how towers anchor FOBs and drills. Sourced to PCGamesN's 11 September guide and the official wiki.
- WARDOGS money
WARDOGS money explained from the sources: the paid actions on the wiki, PCGamesN's six earning methods (zone time, building, taxi, mobile spawn, supply crates, looting), the Hot Zone double-cash rule, every Season 1 price change charted, the 5% community-server bonus, and BULKHEAD's ban policy for cash exploits.
- WARDOGS vehicles
WARDOGS vehicles from the sources: 27 vehicles at launch (PCGamesN), with every price and unlock level BULKHEAD's Season 1 changelog published — Little Bird $50,000, Z20 Lakota $35,000, URAL, Dune Buggy, Kodiak, Humvee with minigun (Driver 30), Heavy Tank (Driver 35), Artillery Tank ($500,000, Career 90) — plus the helicopter handling changes, vehicle locking, and how transport pays.
- WARDOGS classes
WARDOGS classes explained: roles are set by your loadout, not a class menu, and XP flows into six tracks — Career, Medic, Support, Recon, Pilot, Driver. Full Season 1 XP bands (level 6 to 50), every unlock level the changelog lists (Heavy Tank Driver 35, Artillery Career 90, Large Hammer Support 8), and what BULKHEAD said about the grind.
Part of WARDOGS guide. Back to the WARDOGS Playbook home page.

Sukie · Editor
Sukie runs WARDOGS Playbook. She edits every page on the site, checks each figure against BULKHEAD's Steam posts, the store listing and the sources named on the page before it goes up, and rewrites anything a patch note contradicts. The focus is narrow on purpose: what the game actually does, with the source attached.
About this site · How pages are checked · Last updated September 13, 2026
WARDOGS Playbook is an unofficial fan site. It is not affiliated with, endorsed by or associated with BULKHEAD Limited (developer) and Team17 (publisher). Game names, images and trademarks belong to their owners.