
Guide
WARDOGS towers: how to capture one, what the cooldown means, and how the code moves the Hot Zone
WARDOGS towers are the one strategic system the game never explains in its store description. They are tall structures scattered through the Control Zone; capture one and it becomes a vantage point, a base anchor, and — if your team collects the whole code — a lever that drags the Hot Zone toward you. PCGamesN's 11 September 2026 guide is the only dated, named source that documents the procedure, and this page follows it closely and says where it stops.
For context: the Hot Zone is the smaller area inside the Control Zone where each player counts double for control and cash is doubled (WARDOGS Wiki, Game Mechanics). Anything that lets a team decide where the Hot Zone goes therefore decides where the double points and double money go. That is why towers matter more than their sniping value suggests.
Read dates: PCGamesN 11 September 2026; wiki 14 September; changelog 9 September.
What a tower is and what it is worth
PCGamesN describes them as 'large structures' that 'act as a focal point for your FOBs and can be a great vantage point'. At the start of each match 'there will be several unclaimed towers in the zone' — unclaimed, not owned by anyone. They serve three purposes in the guide's telling: a perch for sharpshooters, an insertion point for your team to build a base around, and 'a magnet for the hot zone'.
PCGamesN's money guide connects towers to the safest early income: buy a hammer, 'hitch a ride to the tower nearest your spawn', and build walls, barricades and a door with the FOB's supplies. Steam's trending community guides include one called 'Simple explanation on towers and drills' — drill rigs are on the wiki's list of FOB constructions — which suggests towers and resource drills are linked in the base-building loop, but no primary source we have describes the drill mechanic, so we do not.
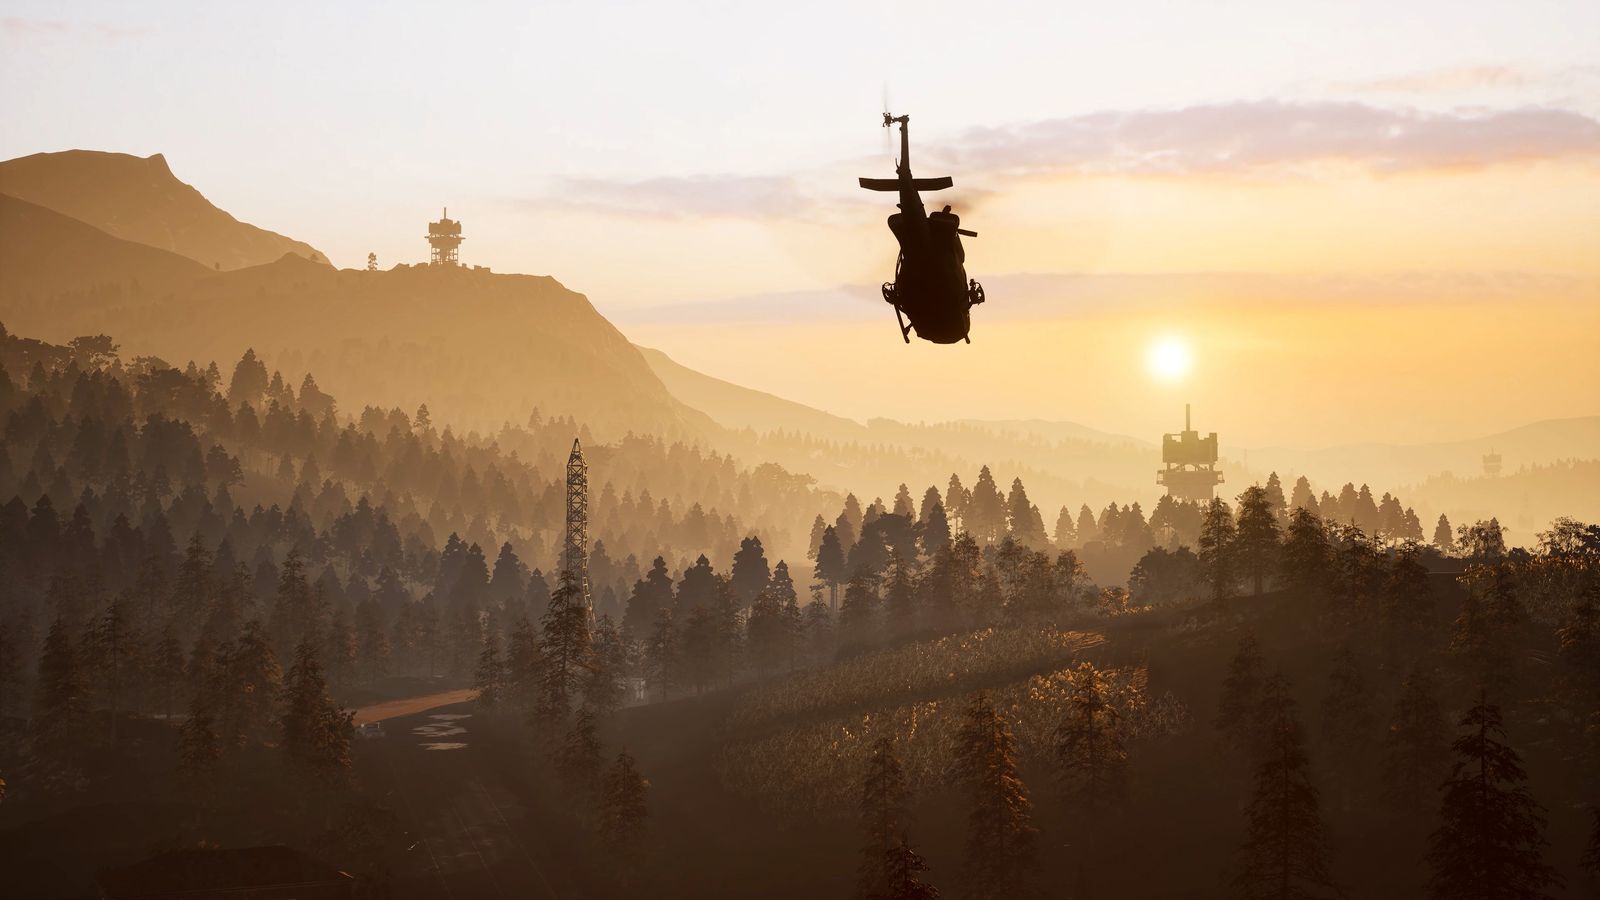
Capturing a tower, step by step
The procedure, per PCGamesN: 'head up the stairs and into the control room — this is on the mid-level of the building — and approach the computer to the left of a keypad. Interact with this computer to hack the tower and claim it for your team.' That is the whole capture. There is no flag-raising timer described, no minimum number of players; the guide describes a single interaction with a terminal.
The catch is the cooldown: 'all towers have a cooldown at the beginning of a match and when they change hands, so you may have to hold out for a few minutes if it's in a hotly contested zone.' Read that as two rules — you cannot capture in the opening minutes, and a tower you just lost cannot be immediately retaken. The guide does not give the cooldown length, so neither do we.
- Climb to the mid-level control room.
- Find the computer to the left of the keypad.
- Interact to hack the tower; it is now your team's.
- If it is on cooldown (match start, or recently changed hands), hold the room until it clears.
- Each capture gives your team one part of the Hot Zone code (next section).
Towers and the beta-era church roof
One changelog line is worth knowing for anyone who learned tower fights in the beta: 'Fixed an exploit that let players reach an unintended position on the church roof.' The same changelog announced that 'cheater bans are now announced in server when match termination is turned off' and that reports are 'weighted so that repeat and bad faith reporters carry less influence'. Perches that were exploits are gone; the towers are the sanctioned high ground.
The four-part code and the Hot Zone magnet
This is the part that changes matches. 'Every time you take a tower, you're given a piece of a code; once you have the complete code, enter it on the keypad to the right of the main terminal. This will activate the hot zone magnet, pulling the area towards the tower.' PCGamesN puts the code at four digits and adds the practical shortcut: 'once you have three out of the four, for instance, you can guess what the last one might be.'
Two things follow. First, this is the only real 'code' in WARDOGS — the searches for 'wardogs tower codes' are about this in-match mechanic, not about redeemable promo codes, which do not exist. Second, pulling the Hot Zone to your tower is a commitment: 'make sure your defences are up to scratch if you pull that hot zone towards you, as you can be sure a lot of trouble will be following it.' The double-count, double-cash zone arriving at your base means two enemy teams arriving with it.
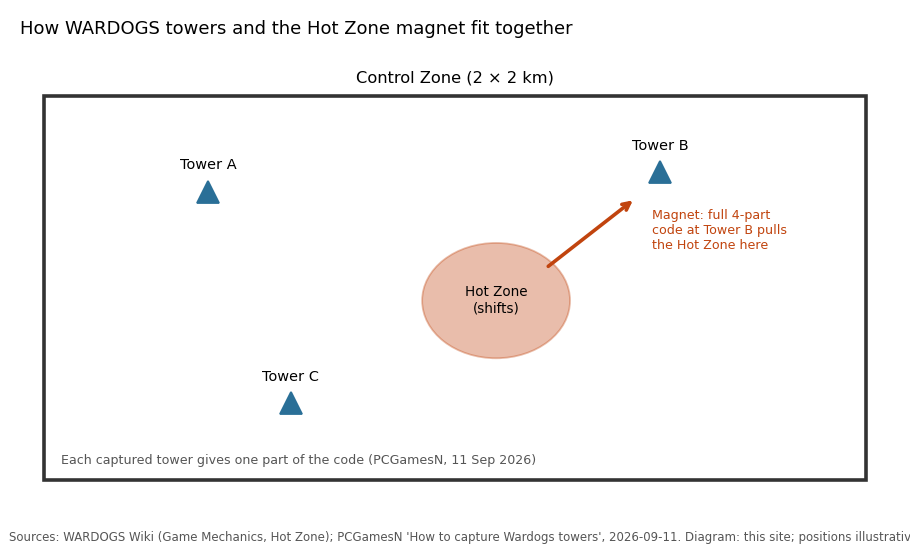
What the code actually switches on: the tower drill, and the fuel that runs it
PCGamesN calls the effect a 'hot zone magnet'. A Steam community guide by hammerworth ('Simple explanation on towers and drills', read 14 September) describes the machinery behind it, and it changes how you plan: entering the code 'will activate the drill' on that tower, and 'for as long as that FOB has fuel supplies which will power the drill, the Hotzone will move towards that tower and stay there until the FOB is destroyed, or fuel runs out. If one of these things happen it'll go back to moving around the map randomly and the tower will have a cooldown.' The guide also describes a buildable drill — 'requires a large hammer to be built. Functions the same as the tower drill, consumes fuel too. Needs lot of supps to be built / takes slow to build' — as the alternative when your team cannot collect the whole code.
Two consequences, both from a community source rather than BULKHEAD, so hold them loosely: the tower needs a FOB at it with fuel supplies stocked, which makes the pilot's fuel run part of the tower play; and losing the FOB or running dry releases the Hot Zone and puts the tower on cooldown. The wiki's FOB supply list — building, ammo, fuel — has a use for the third type here. Drill rigs also appear on the wiki's FOB construction list, which matches the buildable-drill description.
Towers as FOB anchors
PCGamesN's phrase — towers 'act as a focal point for your FOBs' — matches what the wiki says a Forward Operating Base is for: 'a fortified position around a strategic location', ideally 'near the Control Zone, Hot Zone, towers, important routes, or defensible terrain'. A FOB at a tower gets a vantage point for spotters, a defensible structure, and the option to pull the Hot Zone to itself once the code is complete. The wiki lists what a FOB can hold: sandbags, mortars, Talon anti-air launchers, CIWS air defence, Switchblade drone launchers, repair and refuel facilities, drill rigs.
The economics changed at launch. The FOB now costs $7,500 from the vendor (was $2,500) and the vendor's Large Hammer is $2,400 (was $1,600), 'to make them more of a choice' in BULKHEAD's words. A tower base is therefore a team investment; the FOB guide covers what to build first and which supplies each structure eats.
A tower plan for one match, from the sources
Opening minutes: towers are on cooldown, so use the time the way PCGamesN's money guide suggests — hammer from the vendor, ride to the tower nearest spawn, start walls and a door with FOB supplies, collecting Support XP and cash while the timer runs. When the cooldown clears, one player goes to the mid-level control room and hacks the terminal; your team now has a tower and one part of the code. Spotting is a paid teamplay action on the wiki's list, and a tower is the best spotting platform in the zone, so the perch earns even when nobody is shooting.
Mid-match: each further tower your team takes adds a code part. With three of four, guess the last. Before entering it, ask whether the base can survive being the Hot Zone — the wiki's FOB defence list (mortars, Talon anti-air, CIWS, Switchblade launchers, sandbags) is what 'defences up to scratch' means in practice. Enter the code on the keypad to the right of the terminal, and the Hot Zone starts moving toward you: double head count for control, double cash for everyone inside, and two teams inbound. That is the whole strategic arc of a tower, and every step of it is in a dated source.
Defending and taking a contested tower
No source publishes tower hit points or a list of counters, so this section stays with what is documented. Mortars are 'static indirect-fire weapons that can be constructed at FOBs' that let players 'provide fire support from behind the front line without exposing themselves' (wiki); PCGamesN's mortar guide explicitly frames them as the tool to 'flush those camping snipers off that Wardogs tower'. Anti-air at the base (Talon launchers, CIWS) addresses the Little Birds and Lakotas that will arrive once the Hot Zone does. And the cooldown works for the defender too: a tower you hold cannot be flipped back instantly after a fight.
The 'Long Shot' achievement — a kill from over 950 m, held by 2.4% of players three days in — is the kind of thing towers exist for.
Vantage, spotting and the 950-metre shot
Towers are 'great vantage points for your sharpshooters' (PCGamesN), and the Season 1 changelog shows what a sniper's kit now costs: the 6–10x MRAD scope is $40,000 (was $25,000) and the 6–10x MOA scope $45,000 (was $30,000), both on the Recon track. BULKHEAD says the game uses 'real-world ballistics', and the 'Long Shot' achievement requires a kill from over 950 m — 2.4% of players had it on 13 September. A tower gives the height that makes those distances visible; the Control Zone is only 2 km across, so from a central tower most of the objective is inside that range.
Spotting is the cheaper version of the same job. It is on the wiki's list of cash-earning actions and needs no $45,000 scope. A tower spotter calling targets over squad voice while a mortar team at the base walks rounds in is the combination PCGamesN's two guides describe from either end — and since proximity voice is always on, an enemy climbing the stairs will hear it.
Why this matters for the whole match
The Control Zone is 2 × 2 km inside a 256 km² map, chosen at random each match, and control is decided by head count. The Hot Zone doubles both head count and cash. A team that owns the towers therefore owns the choice of where the decisive fight happens and where the money is. That is a lot of leverage for a system whose entire interface is one computer and one keypad, and it is why the towers guide sits beside the money guide rather than the sniping tips.
Questions people ask
- How do you capture a tower in WARDOGS?
- Go to the mid-level control room and interact with the computer to the left of the keypad to hack it for your team (PCGamesN, 11 Sep 2026).
- Why can't I capture a tower at the start of the match?
- All towers have a cooldown at the beginning of a match and whenever they change hands; you may need to hold the room for a few minutes.
- What are WARDOGS tower codes?
- Each captured tower gives one part of a four-digit code. Entering the full code on the keypad to the right of the terminal activates the Hot Zone magnet. They are not redeemable promo codes.
- What does the Hot Zone magnet do?
- It pulls the Hot Zone — where players count double and cash is doubled — toward the tower where the code was entered.
- Can I guess the last digit of the code?
- PCGamesN suggests that with three of four digits you can guess the last one.
- Are towers required to win?
- No. PCGamesN: 'These aren't vital for winning a match, but can give you the edge.' Winning is 100 points from holding the Control Zone.
- Should I build my FOB at a tower?
- The wiki lists towers among the good FOB sites, and PCGamesN's money guide recommends building at the tower nearest your spawn for safe Support XP and cash.
Sources & further reading
- PCGamesN — How to capture Wardogs towers (11 Sep 2026)
- PCGamesN — How to make Wardogs money fast (11 Sep 2026)
- PCGamesN — How to build a Wardogs mortar (11 Sep 2026)
- WARDOGS Wiki — Game Mechanics (CC BY-SA), read 14 Sep 2026
- BULKHEAD — Pre-Load Live & Season 1 Changelog (Steam, 9 Sep 2026)
- Steam Community — WARDOGS guides listing (trending), read 13 Sep 2026
- Steam — WARDOGS achievements and global unlock rates, read 13 Sep 2026
Read next
- WARDOGS guide
WARDOGS guide hub: how the Control Zone and Hot Zone score, how the $10,000 cash loop and six progression tracks work, and links to nine guides — first match, money, towers, mortar, FOB, classes, vehicles, settings and achievements — each traced to BULKHEAD's patch notes and the official wiki.
- WARDOGS FOB
WARDOGS FOB guide from the sources: the Forward Operating Base is $7,500 after Season 1 (was $2,500), holds mortars, Talon anti-air, CIWS, Switchblade launchers, repair and refuel bays and drill rigs, and runs on building, ammo and fuel supplies. Hammers, placement near towers and the Hot Zone, and how building pays Support XP and cash.
- WARDOGS mortar
WARDOGS mortar guide from the sources: it needs the Large Hammer (Support level 8 after Season 1), building supplies at a FOB, and ammo supplies to keep firing; you aim by heading and range with no map overlay, WASD for coarse and mouse for fine. Prices, the changelog's loadout-slot change, and what nobody has published yet.
- WARDOGS money
WARDOGS money explained from the sources: the paid actions on the wiki, PCGamesN's six earning methods (zone time, building, taxi, mobile spawn, supply crates, looting), the Hot Zone double-cash rule, every Season 1 price change charted, the 5% community-server bonus, and BULKHEAD's ban policy for cash exploits.
- How to play WARDOGS
How to play WARDOGS from the tutorial to your first paid loadout: what the three teams and the Control Zone mean, what to buy with $10,000, the free rifle, why the Hot Zone pays double, and the mistakes that empty a new account — all sourced to BULKHEAD's posts, the Steam store and the wiki.
Part of WARDOGS guide. Back to the WARDOGS Playbook home page.

Sukie · Editor
Sukie runs WARDOGS Playbook. She edits every page on the site, checks each figure against BULKHEAD's Steam posts, the store listing and the sources named on the page before it goes up, and rewrites anything a patch note contradicts. The focus is narrow on purpose: what the game actually does, with the source attached.
About this site · How pages are checked · Last updated September 13, 2026
WARDOGS Playbook is an unofficial fan site. It is not affiliated with, endorsed by or associated with BULKHEAD Limited (developer) and Team17 (publisher). Game names, images and trademarks belong to their owners.